
 October 6th, 2015
  easygroup
 The attached instructions will work on all chipped Canon inkjet cartridges (including the PGI 5 / CLI 8 / PGI 220 / CLI221 / PGI 225 / CLI 226 / PGI 250 / CLI 251 ink cartridges):
1. Identify the location of the existing chip on the underside of the cartridge. You will notice that it is held in place with 4 protruding pieces of plastic shown by the red circles in the image below. Using a sharp object such as a knife (be careful not to cut yourself!), gently pry away at the plastic protrusions.
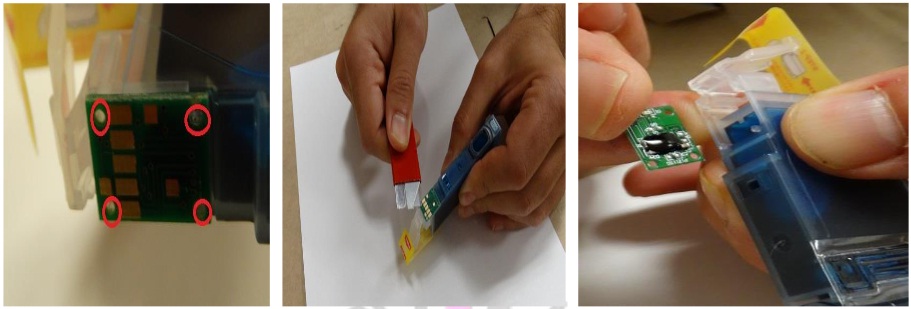
Exerting just a little pressure on them with a sharp object will dislodge them. Now the chip will come freely off.
2. Insert the new chip in the same orientation as the old chip was facing (make sure you pay close attention to the way the chip is facing onto the cartridge before you take it off). To hold the new chip in place, use some crazy glue on the edges of the chip and/or on the prong locations that you cut off in step 1. Be careful NOT to put too much glue as you do not want the glue to get onto any of the electronic circuits on the chip itself. Just a tiny drop of glue in a couple of locations will be enough to hold the new chip in place.

 Posted in
  Tags:
Tags: